
We’ve all been there —you’re driving and all of a sudden, the yellow check engine light comes on. It’s understandable to be alarmed, but don’t leap to worst-case scenarios. At any one moment, the warning light may suggest anything from a cap that is loose to a significant issue.
When you know what a mechanic in Berwick looks at first, you can breathe a sigh of relief and be smart about how you move forward. So, here’s a refresher on what normally occurs when your car signals you with this warning.
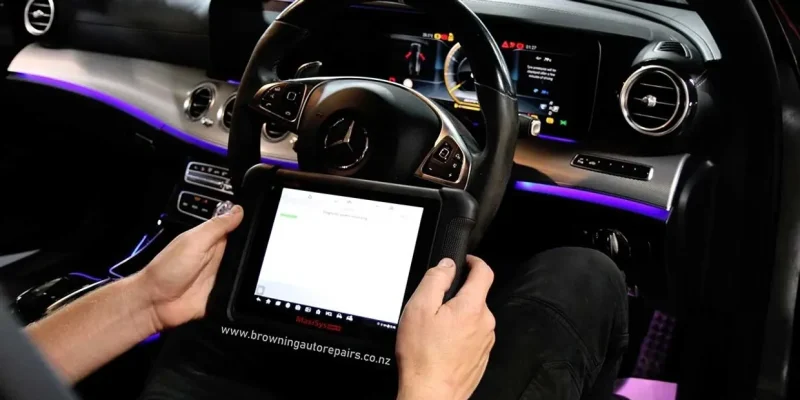
Step 1: Scan the Trouble Codes
The onboard computer stores fault codes whenever there is a problem detected. When you bring your car in, a technician is going to hook up a scanner to read those codes.
These codes are something like clues – they don’t identify the exact problem, but they do narrow it down. For example:
- P0300: Engine misfire
- P0420: Catalytic converter problem
- P0455: Emission system having large leak
Each code directs the mechanic towards a certain pressure. Using these codes and experience gained from working with their hands for years, a trusted mechanic in Berwick can quickly identify the root cause in no time.
Step 2: Look Over Your Car’s Recent Past
Your mechanic will want to know before beginning extensive repairs:
- Any recent service/releases (things)
- When the light did go on
- Regardless of the matter whether you have just filled up your gasoline tank
You’d be surprised – something as simple as failing to tighten the gas cap can set the light to activate!
Step 3: Look Over the Usual Suspects
Some parts are common culprits for check engine lights in general. These are the ones mechanics start with:
- Oxygen sensors: Sensors that measure oxygen levels are employed for the purpose of determining how efficient the fuel combination is
- MAF (mass air flow sensor): Manages how much air the engine takes in
- Spark plugs and coils: If they’re bad, you’ll have misfires
- Catalytic converter: Contributes to the reduction of hazardous emissions
These components are reviewed for cleaning, adjustment, or replacement.
Stage 4: Leak Testing by Smoke
A smoke test could be performed by the mechanic in the event that the fault code indicates that there is a leak in the emissions system. That includes injecting harmless smoke into your car’s system to locate the leak.
This technique is particularly helpful when you’re trying to find small leaks that are otherwise invisible – such as a hairline crack in a hose or a worn-out seal.
Step 5: Take the Vehicle for a Test Drive and Reset the System
The light is reset after repairs or checks are complete, after which the car is taken on a brief test drive. If all is well, the light stays off. But if it happens again, your mechanic will need to re-inspect the system.
This last part makes certain that your car is ready to hit the road.
A1 Gas & Mechanical Services Pvt. Ltd. provides this kind of full-scale check as a part of a comprehensive car service in Berwick — which should help ensure drivers there’s nothing that was missed.
Is It Really Safe to Continue Driving While the Light is on?
If the check engine light doesn’t flash but is on steadily, you can continue driving, though you should have your vehicle serviced soon. In the event that it is flashing, however, you should pull over and call for assistance. A flashing light is often an indicator of a serious problem – misfire — that can cause costly damage, so it has to be dealt with quickly.
Final Words
It’s your car’s way of telling you that something’s up that needs your attention! Having it inspected early by a qualified mechanic in Berwick could save costly repair costs on the track.
No matter if it’s something on a smaller scale, or something more serious, making time for a first-rate car service in Berwick will help you to identify issues before it’s too late, and save you money, and potential harm to your vehicle.


Comments